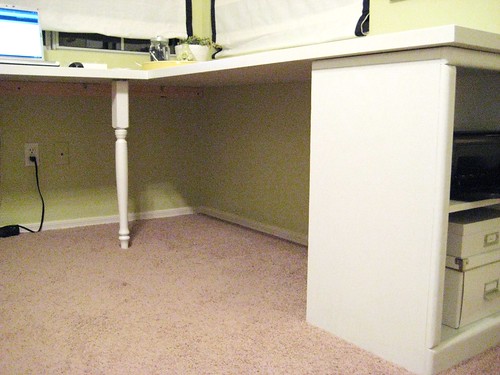
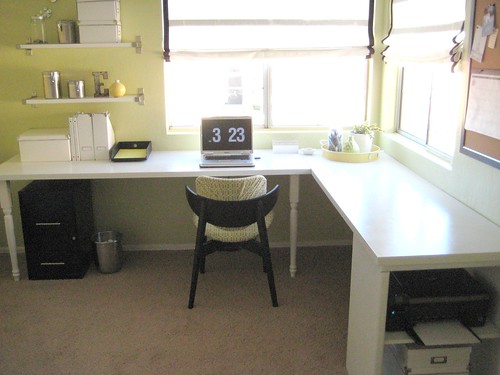
Here are the supplies I used and about how much I spent.

(2) 24"x80" interior doors - $20/each = $40
(2) 29" table legs - $12/each = $24
White interior latex paint = $10
Wipe-on polyurethane (clear gloss) = $10
29" high bookshelf = free
(Make sure the bookshelf is the same height as your table legs.)
(4) "L" brackets and (1) flat bracket = about $4
Piece of lumber sized 1"x2"x96" = $8
(The wood board needs to be about the same length as long side of a door + short side of door, which for me was 80" + 24" = 104", but 96" was plenty long enough to support it.)
TOTAL for entire desk = about $96
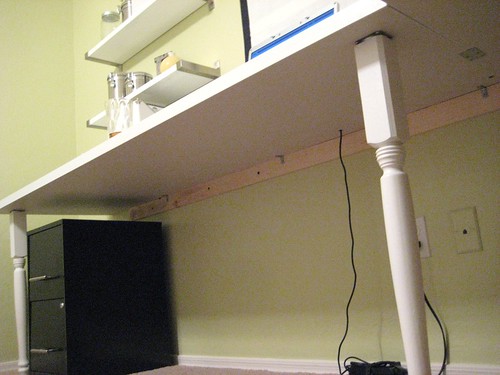
The first step is mounting the wood board to the wall. This is going to support one side of the desk, like this:

My bookshelf and table legs were all 29" tall, so we obviously mounted the board so that the top of it was at a height of 29".
Before you start to put together the rest of the components, paint everything white.
Next attach the two table legs to one side of a door. I didn't take a picture but it looked like this, thanks Google.

Then it's simply a matter of setting the doors onto their various supporting elements. One door is supported by the bookshelf on one end, and the wood board on the other.

The other door is supported by the two legs on one side, and the board on the other.

We used a little wood glue on top of the wall board and on top of the bookshelf to keep the doors from sliding. Then connect everything together with the brackets and drill a hole where you want your computer cord. Finally I wiped on two coats of clear polyurethane after it was all put together.
Done and done my friends.

Now you're all very sick of my office. I'll talk about something else tomorrow I prom prom promise.


No comments:
Post a Comment